Welcome to the Ongrano EORI Number installation guide.
In this post, we will walk through the process from the initial installation of the Plugin to its activation on your Shopware 6 checkout pages. To ensure ease of understanding, we will illustrate each step with screenshots.
Let's get started on installing and activating this vital tool for facilitating international trade on Shopware 6.
We begin our guide on the assumption that you've downloaded the plugin from the Shopware Store. If you're unsure where to find it, you can download the Ongrano EORI Number plugin here.
Our initial focus will be on how to activate and configure our plugin, setting the stage for smooth international transactions.
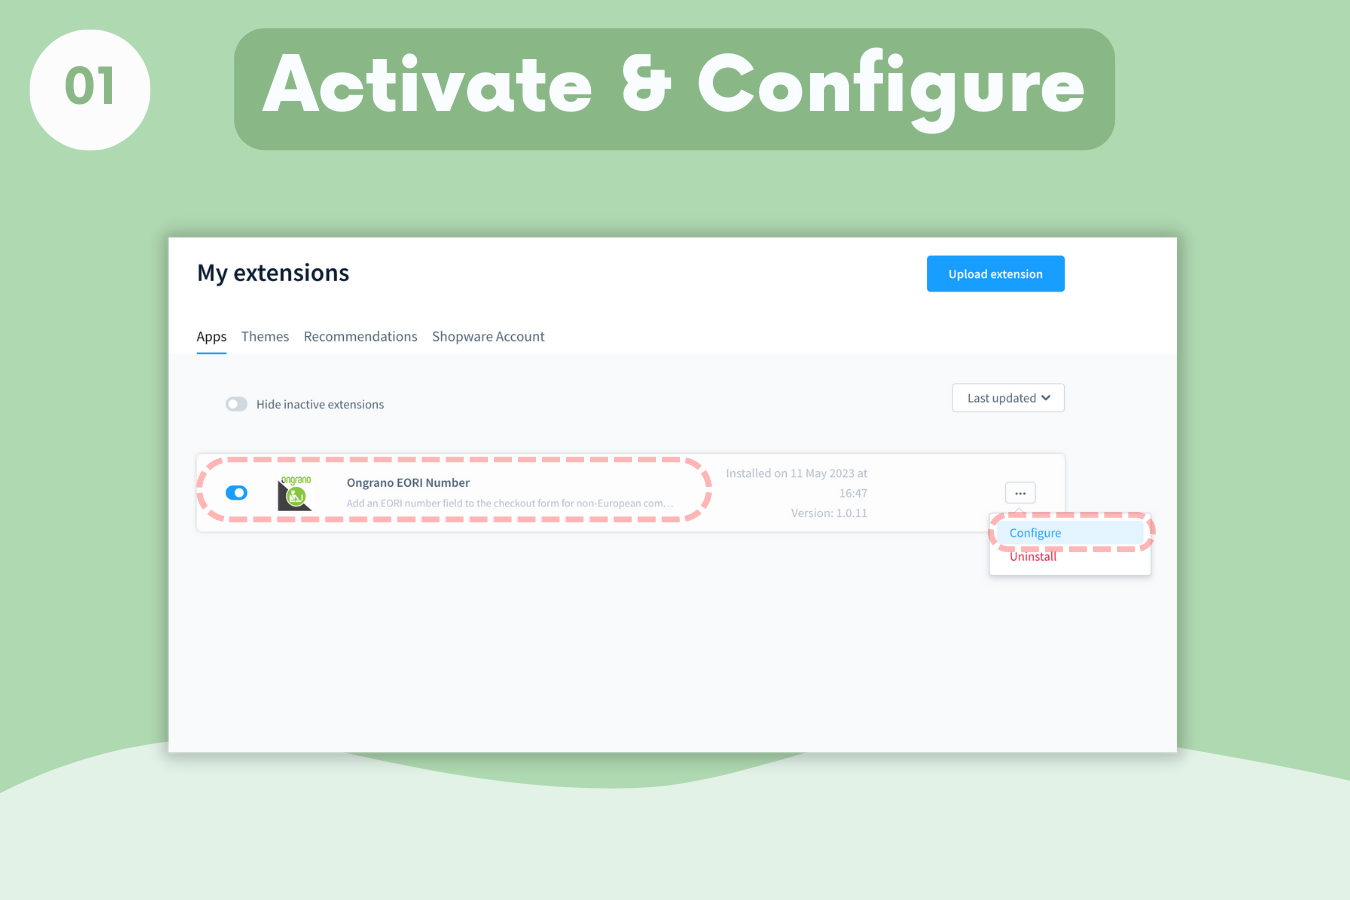
Our first step is to activate and configure our plugin

Activate Ongrano EORI Number and Click the Configure button from dropdown menu

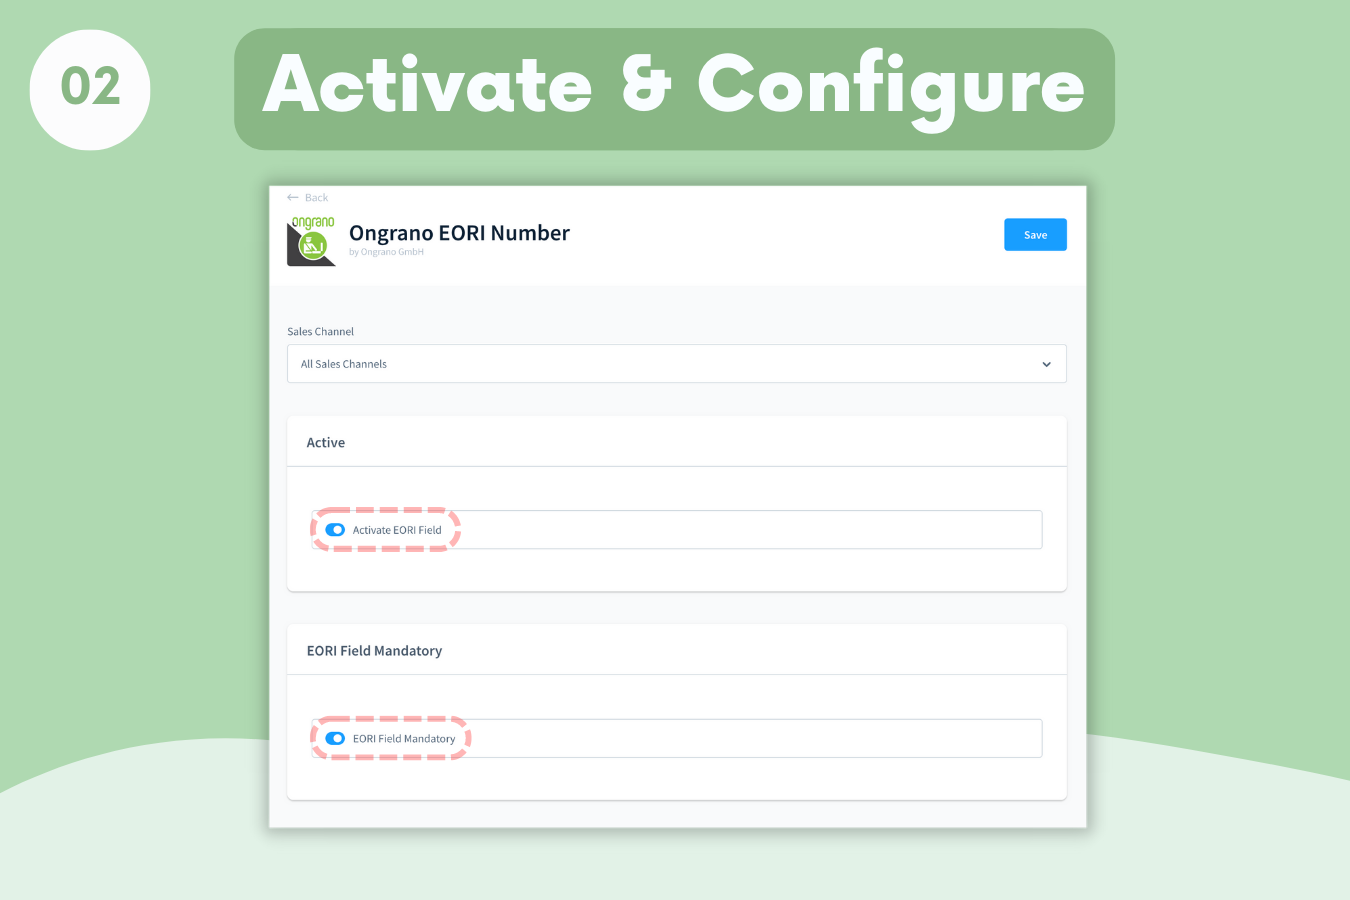
You will see that there are two settings. the first of these is activating the EORI Number for the selected Sales Channel. Our second setting is EORI Number needs to be required for Commercial Users.
Checkout and Register Pages

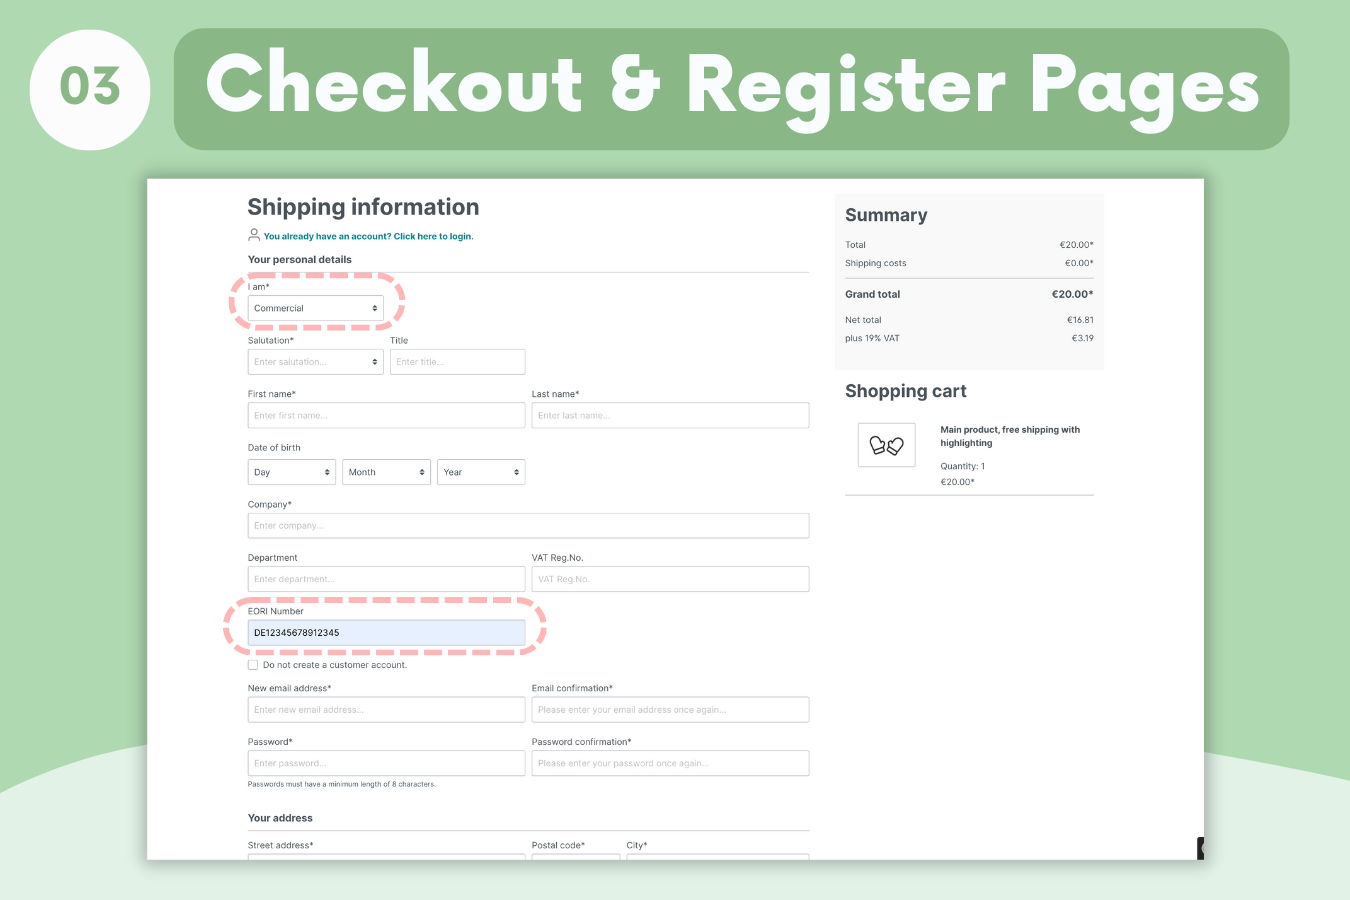
For users selected as commercial, the EORI Number field will appear to be filled. If you have set EORI number as a required field and the user has not filled in this field, they will be prompted with an error message.
Manage Customer's EORI Number

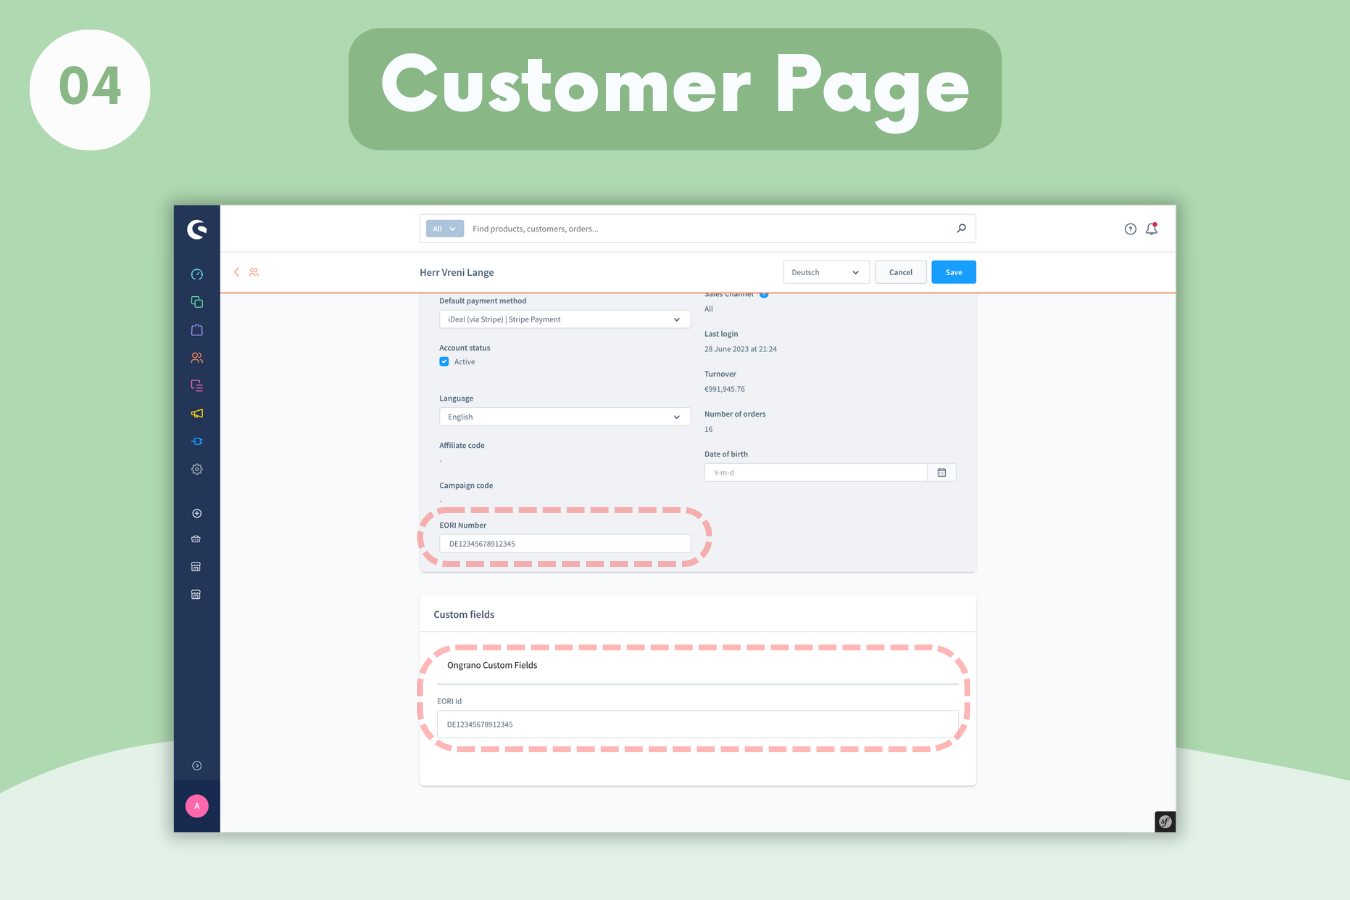
To manage the EORI Number field, you can access the EORI Number field on the relevant user page from your admin panel. For store owners working with ERP Applications, this EORI Number is written into customFields so you can pull and manage this number with customFields settings with your ERP program.
For Custom Fields setting, you can use this field sync with Customer's customField named "eoriNumber" in CustomFields field in your ERP application.
EORI Number is that easy to setup, you can contact us on our Support page for more help.

Comments(0)